Tuesday, 25 November 2014

Part B (Character) - Game Card/ Game Interface

For today's character class, we were tasked to create an interface for a card game. My characters were angry birds and I have based my game based upon Saboteur.


Second part of the lesson was to create an interface for our game. I know that in my game, I will need the number of lives and timer and this is what I've came up with. 


As I am still working on my background designs of my game and after talking to Justin about it, he suggests that I should have my game within a frame and he sketched this out for me. As the feedback by doing so would make the game better visually and more interesting, I shall work towards that for this project.

Part B (Character) - Company Challenge

For the last of our character class, we we split into 2 teams of 3 where we were tasked to create characters and environment from the brief we were given. Mid way through the challenge, the company had to let go an employee and unfortunately I was the one so I switched over. Working with all 5 people in a day for this challenge, I had to learn to adapt fast and understand my new team's workflow and try to fit in immediately to get the work going. Overall, both team scored pretty well but it was not about the points. Justin points out that it is all about communication with the company and maintain the relationship as we go through the project to make sure that we are always on the right track.


Monday, 24 November 2014

Part A (Narrative) - Character Facial Expressions Development

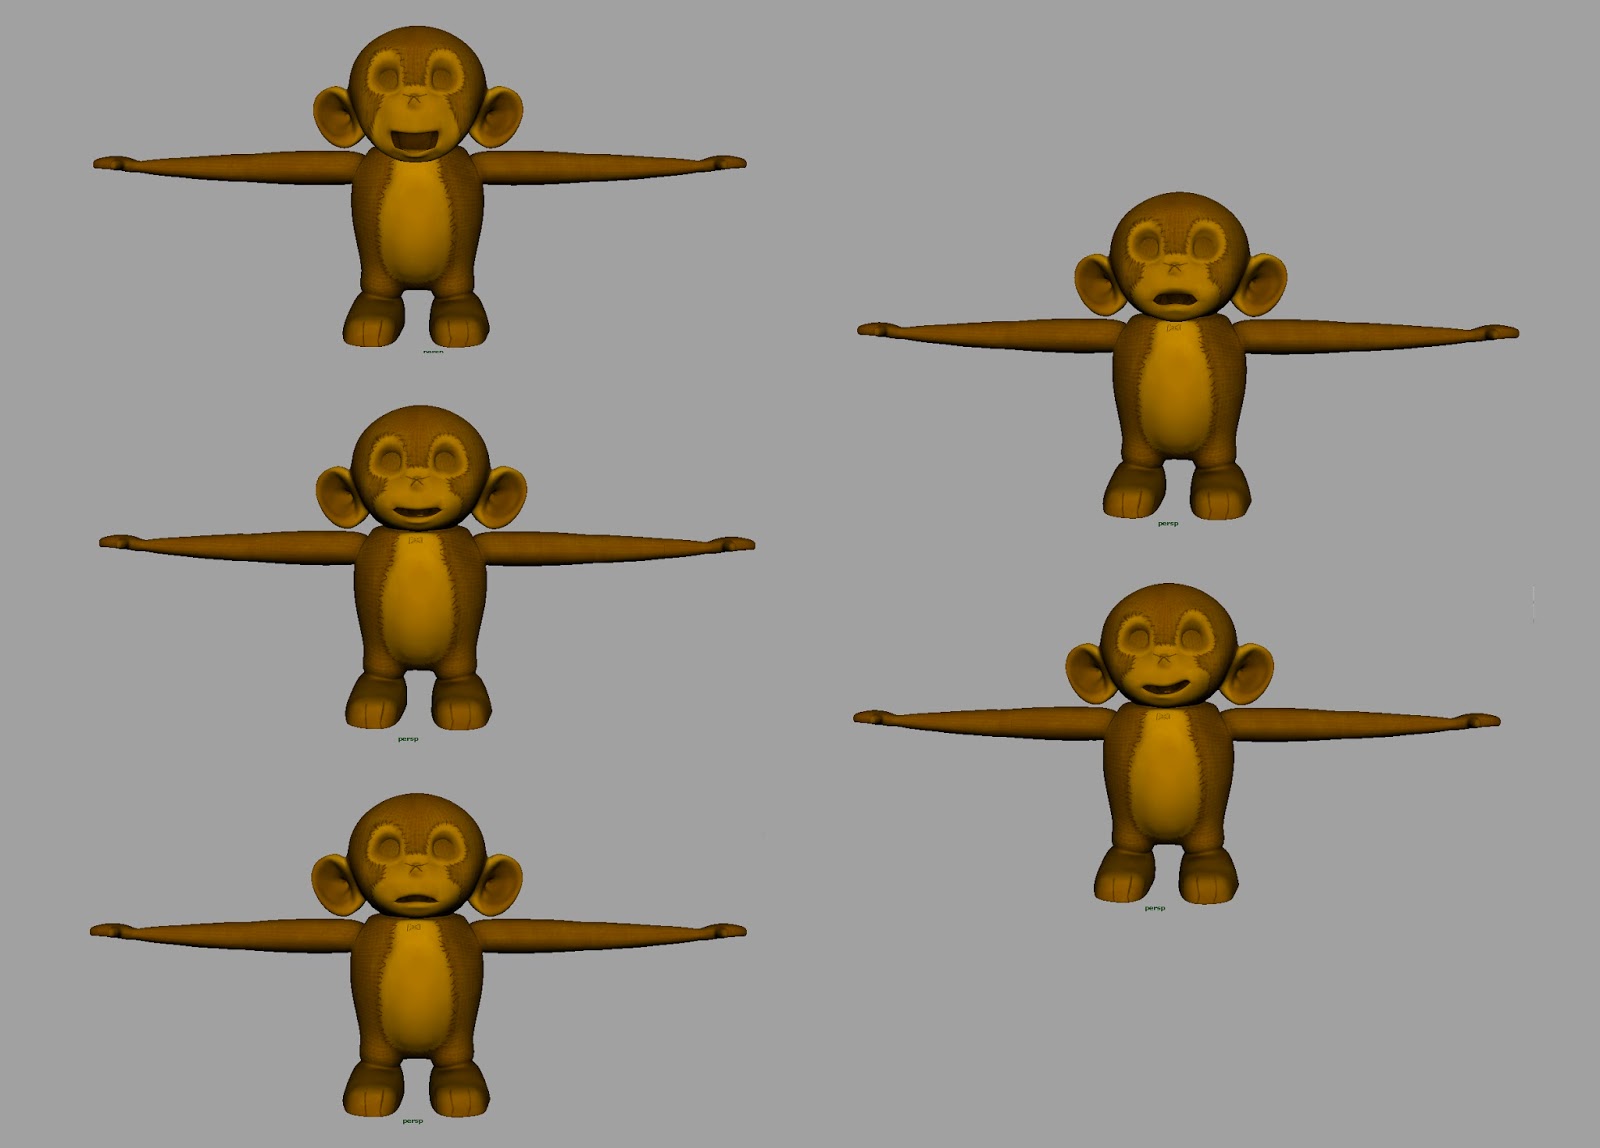
This is the second set of blendshapes because as we moved along the project, we discovered that the scaling of the whole rig was not working properly and because of that, whatever that comes after in the pipeline was not working properly. Hence, Ayunie went back to fix the rig before doing the blendshapes again.


We also encountered problems when doing blendshape so Alan gave a hand and taught us to do a parallel blendshape for our character to ensure that the blendshapes work.

Part A (Narrative) - Character Facial Expressions

After sculpting the various facial expressions, I went to do the blendshapes. However, there is a problem. The whole model seem to move down when everything else was kept the same when the blendshape was done.

Friday, 21 November 2014

Part A (Narrative) - Character Rigging Complete

This is our character fully rigged. I have added additional joints to the ears so that we will have a better control of it. The character's ears will droop when it's sad and will rise when he's thinking or happy.


This is some of the character's expression. Since our character's eyes are buttoned eyes, which means it's fixed, the expressions will be controlled by the eyebrow and mouth movements.


Tuesday, 18 November 2014

@Alan Part A (Narrative) - Character Skinning_Edit_02 (Bind Skin & Paint Weights)

This is the skinning done for the monkey. Will work on the rig next.


Alan, is it possible for me to start to set up the rig first and then see you tomorrow to do the feet? In the tutorials, the lower body was done first.

Part B (Character) - Animals Anatomy Exercise

In today's character class, we were tasked to draw an anatomy of an animal of our choice. I chose a panda.


In the second half of the class, we were given an environment and create an animal living in that situation. My environment was a forest. I looked into the anatomy's of a tiger, deer, zebra, bear and a fox. I came up with this.
However, after talking to Justin about it, his feedback was that the upper body of this character was interesting and I should work more on the lower half. This was another design I came up with.

Saturday, 15 November 2014

Part B (Character) - Body and Face Expressions Exercise.

For Tuesday's class, the exercise was to quickly sketch poses (Gestural drawings) with the given words.


The second part of the exercise was to pick a character and draw different expression of it. I initially picked Tweety Bird and went on to do Mickey Mouse after.


@Alan Part A (Narrative) - Character Skinning (Bind Skin & Paint Weights)

Alan, I bound the joints to the skin and here's the preview of it.

However, I am unsure about on how to paint the weights for the Spine Joints and Pelvis. Could you guide me please? Thank you.


Tuesday, 11 November 2014

Pipeline 1: Skinning Part 2 (Building the Skeleton)

This is the character's skeleton, built.


Part A (Narrative) - Character Textured (With Bump Map)

We have decided to add bump mapping model as previously discussed because if we don't, the texture looks too flat.


Texture Map
Bump Map

Part A (Narrative) - Main Prop (UV Mapped)

This is our Main Prop that I have gone to lay the UVs which is now ready for texturing.


Part A (Narrative) - Main Prop

From the concept art, I have gone ahead and model the prop.


Pipeline 1: Skinning Part 1 (Building a Ribbon Spine)

This is the set up of ribbon spine completed.