
Showing posts with label Thumbnail Sketches. Show all posts
Showing posts with label Thumbnail Sketches. Show all posts
Thursday, 12 December 2013
Secret Lair : Final Clockwork Priestess' Secret Lair
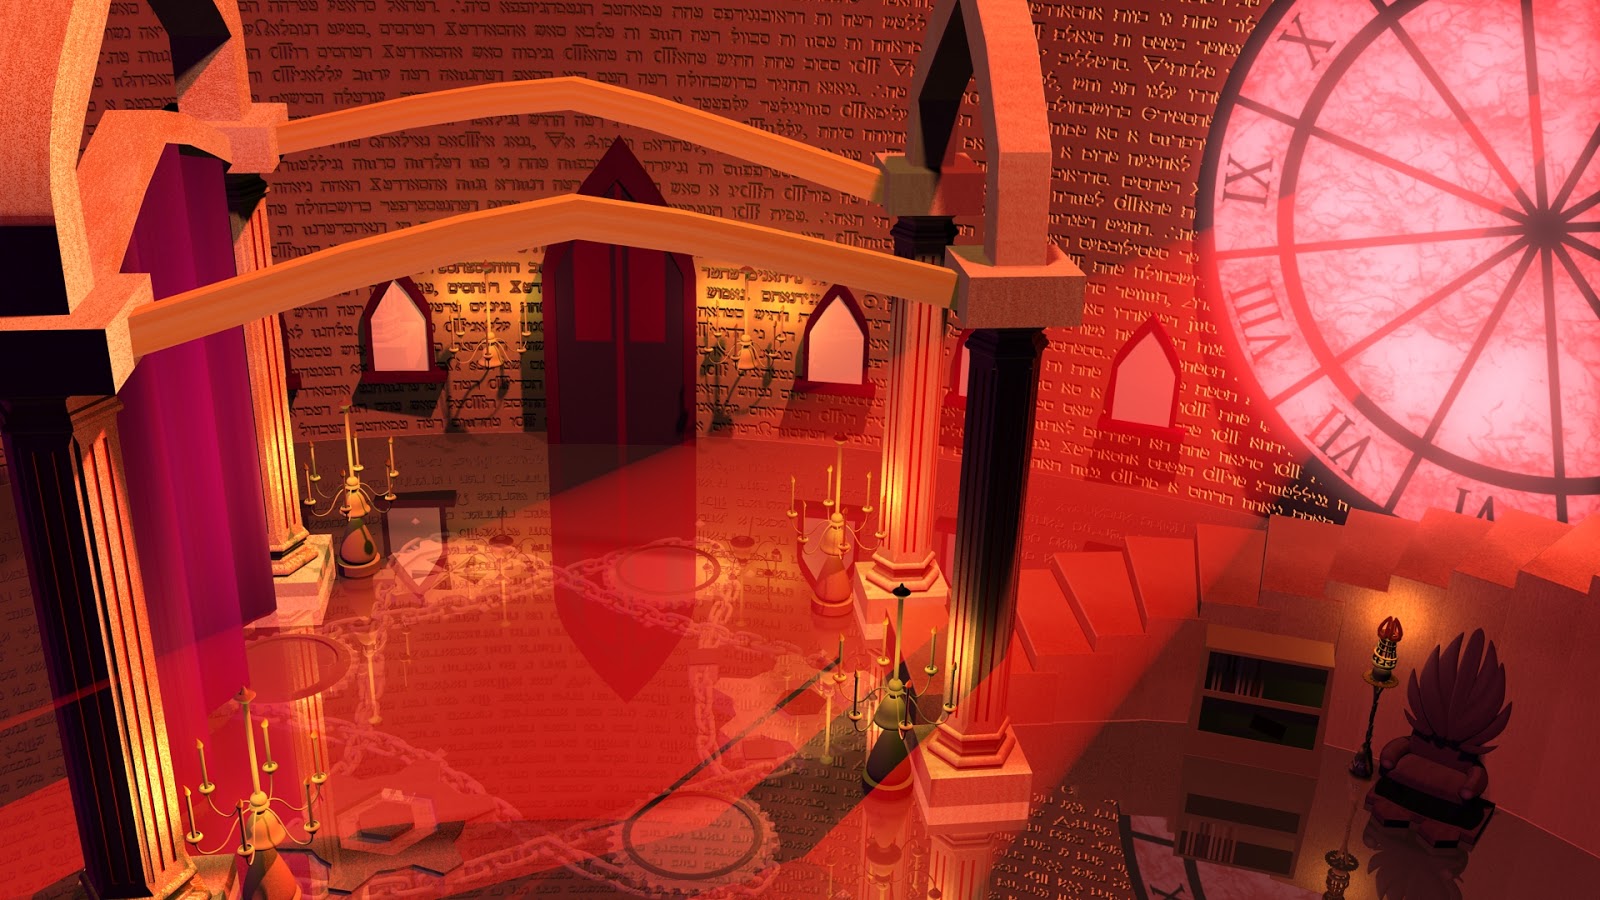
I am very pleased with how my final outcome as it is similar to what I have in my initial concept art except for the few changes in lighting. I did not thoroughly consider it in my concept art but pushed it further when I did my lair.
 |
| Final Concept Art |
 |
| Final Render |
Wednesday, 11 December 2013
@Alan Secret Lair: Clockwork Priestess Lair Final Render Problem
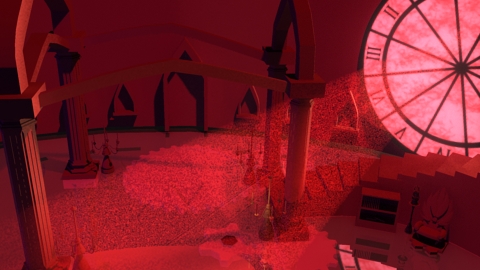
This is my final rendered scene but I am having difficulty with the glow. I've checked all my settings and it is the same as the ones in the tutorials. As I have candle lamps around my lair, I would need it to emit light and glow. After rendering the whole scene, my glow doesn't appear. It only appears when I select a region of it to render. What could possibly be the problem though?
 |
| Final Render |
 |
| Region Render |
Secret Lair: Clockwork Priestess Lair Further Development
Initially, after my render as seen in Figure 1, I thought I was done. But since I had more time, I went back in to tweak the lightings as seen in Figure 2. It is not my final image yet as I am still trying to push the lighting by adding rim lights to the pillars near the clock and a speck of highlights to the other column.
 |
| Figure 1 |
 |
| Figure 2 |
Sunday, 8 December 2013


Thursday, 5 December 2013
Secret Lair: Clockwork Priestess Lair's Development
Here are my developments to my lair. Once I got the lighting set up, I added textures to the scene. From 14 to 15, after I got all the lights in, including the wall lamps, I added the Hebrew engravements to the wall and the gears with the chains below the glass surface of my ground. In 16, I added the drapes and added texture and lighting to it so that it matches my Final Concept.
 |
| 14. |
 |
| 15. |
 |
| 16. |
Wednesday, 4 December 2013
Secret Lair: Clockwork Priestess Lair's Lighting Test Development
I continued with my lighting test for my scene. 9 and 10 was a little purplish and the light ray was not working well so I made adjustments by plugging in the ambient occlusion as suggested. My scene turned out to be better so I continued adding candle lights around the lair as seen in 11 -13. Colours in this images are a little washed out and it doesn"t look like my rendered image.
Is there a way I should have done to save the image in Maya so that it doesn't washes out when I upload it to blogger?
 |
| 9. |
 |
| 10. |
 |
| 11. |
 |
| 12. |
 |
| 13. |
Is there a way I should have done to save the image in Maya so that it doesn't washes out when I upload it to blogger?
Tuesday, 3 December 2013
Secret Lair: Clockwork Priestess Lair's Lighting Test
Before putting in the textures, I have decided to do some light tests for the scene. For number 1 - 3, I played with the intensity of the lights to see how it affects the overall scene. For 4 and 5, I have added an ambient light and played with the colours. In 4, I just had an orange ambient light but in 5, I added a ramp to the colour as I am aiming for a gradual gradient of purple to red lights which is not much of a success.
 |
| 1 |
 |
| 2 |
 |
| 3 |
 |
| 4 |
 |
| 5. |
 |
| 6. |
 |
| 7. |
 |
| 8. |
I am not sure at which stage I should be rendering the images. Is it before or after I plug in the ambient occlusion note?
Friday, 29 November 2013
Secret Lair: Clockwork Priestess' Props (UV Textured)
In my lair, I have this chair and the lamp as part of the props that I have UV textured.
 |
| Chair UV Textured |
 |
| Lamp UV Texture |
Secret Lair: Clockwork Priestess Hero Prop
Taking my drawing of the hero prop as a reference, I went on into Maya to model it out. I like how the stand turned out to be but I may revisit it to make it better.
 |
| Hero Prop Drawing |
 |
| 3D Model |
 |
| UV Mapped |
Tuesday, 26 November 2013
Secret Lair: Clockwork Priestess' Chair Model
Here's my other prop for my lair which is the chair. I did minor changes to the stage of the chair but the rest of the model was in accordance to my drawing.
 |
| Chair Reference Image |
 |
| 3D Chair Model |
Secret Lair: Clockwork Priestess' Lair Lamp Model
I began to model my props in my lair which is the lamp. I am very satisfied with the outcome as it is exactly like the drawing I had for it.
 |
| Lamp Reference Image |
 |
| 3D Lamp Model |
Tuesday, 19 November 2013
Secret Lair: Clockwork Priestess Hero Prop Further Development
From my previous hero prop thumbnail, I further developed it by making it more personal for my character. Hence, I added her initials and the stand of the scepter to have more sharp edges as it is her weapon, accessory and torch all at the same time. I also tried different colours to see what suits best for my lair and to me, 15 works best.


Secret Lair: Clockwork Priestess Concept Art Further Development
I went back to adjust the lighting to my scene and this art is going towards my final piece for the lair. I am happy with all the props that I have placed in this lair except for the chair which I am considering to revise.

Secret Lair: Clockwork Priestess Thumbnails (65 - 67)
In this set of thumbnails, I tried pushing further in terms of colours and highlights. Comparing 65 and 66, I added more light coming from the clock and I like how it looks like now. With thumbnail 66 and 67, I tried adding reflections to the ground as I my lair's ground will be made of glass. I am struggling with this so any advice on how I can achieve this will be much appreciated :)
 |
| Thumbnail Development : 65 |
 |
| Thumbnail Development : 66 |
 |
| Thumbnail Development : 67 |
Secret Lair: Clockwork Priestess Thumbnails (59 - 64)
In this set of thumbnails, I tried doing colour compostions for it. I like 60 as the colours are dark and rich which is what I am after.
.jpg)
Monday, 18 November 2013
Secret Lair: Clockwork Priestess Thumbnails (54 - 58)
I had difficulties with the perspective so I modelled out the basic shapes in Maya before painting it over. After speaking to Jordan today, he said to experiment and be brave when lighting my scene as it is a bit flat for now. I like the reflection off the surface from thumbnail 57 as my ground is made of glass with gears and chains underneath it. In terms of lighting, I like 58 but I will experiment with some other lighting colours to see what works best for my character and the lair.
.jpg)
Subscribe to:
Posts (Atom)